This guide explains how site users can register a biometric passkey, such as a fingerprint or Face ID, using CS BioLogin.
It covers the two browser experiences visitors are most likely to encounter: Google Chrome and Safari.
Table of Contents
Use AI to summarize this article
The registration process is the same wherever the “Register Biometric Device Now” button is available, including:
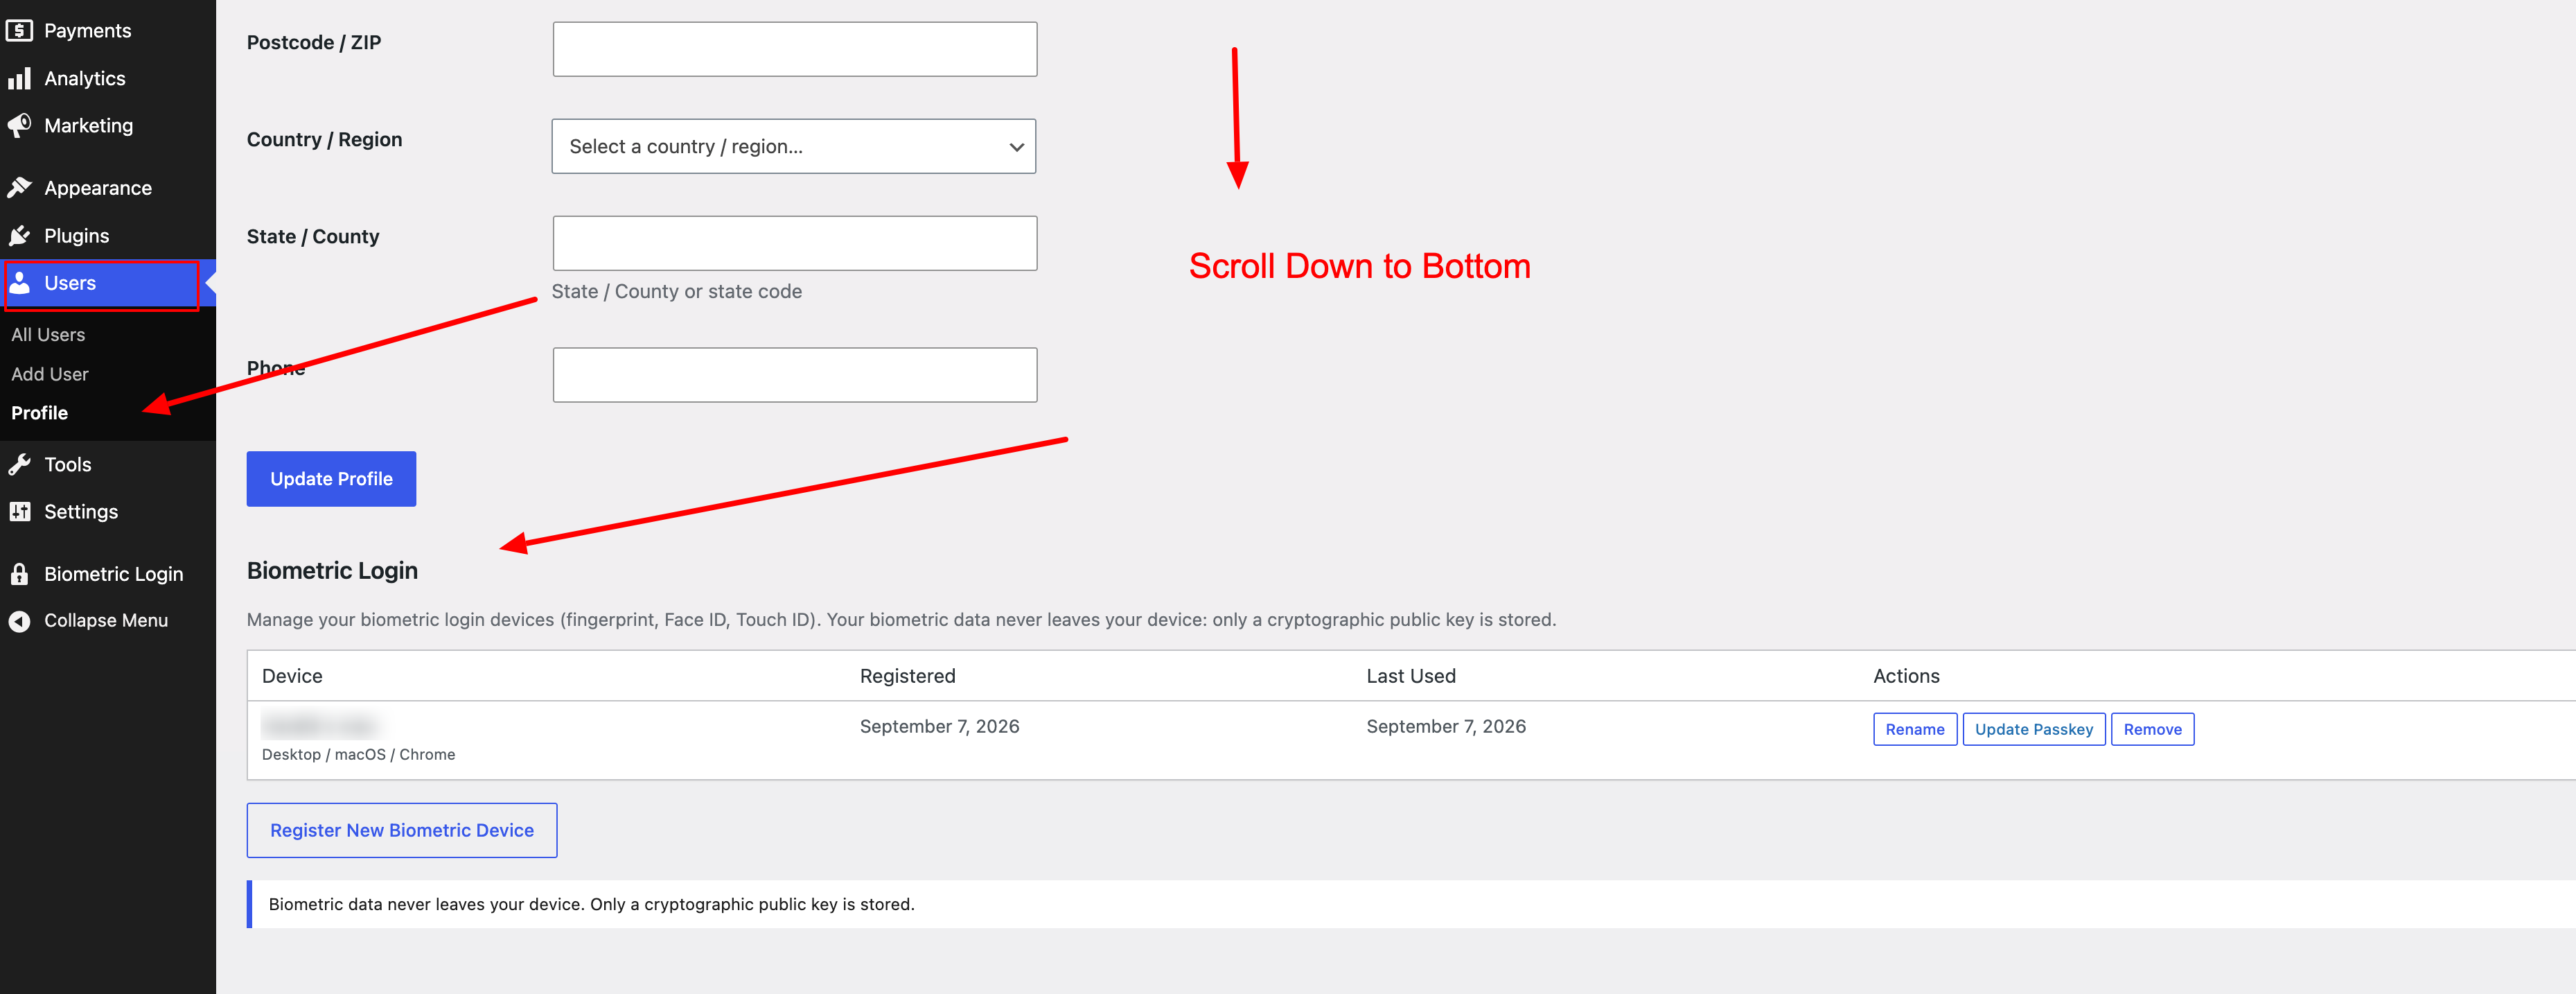
- The WordPress user profile page
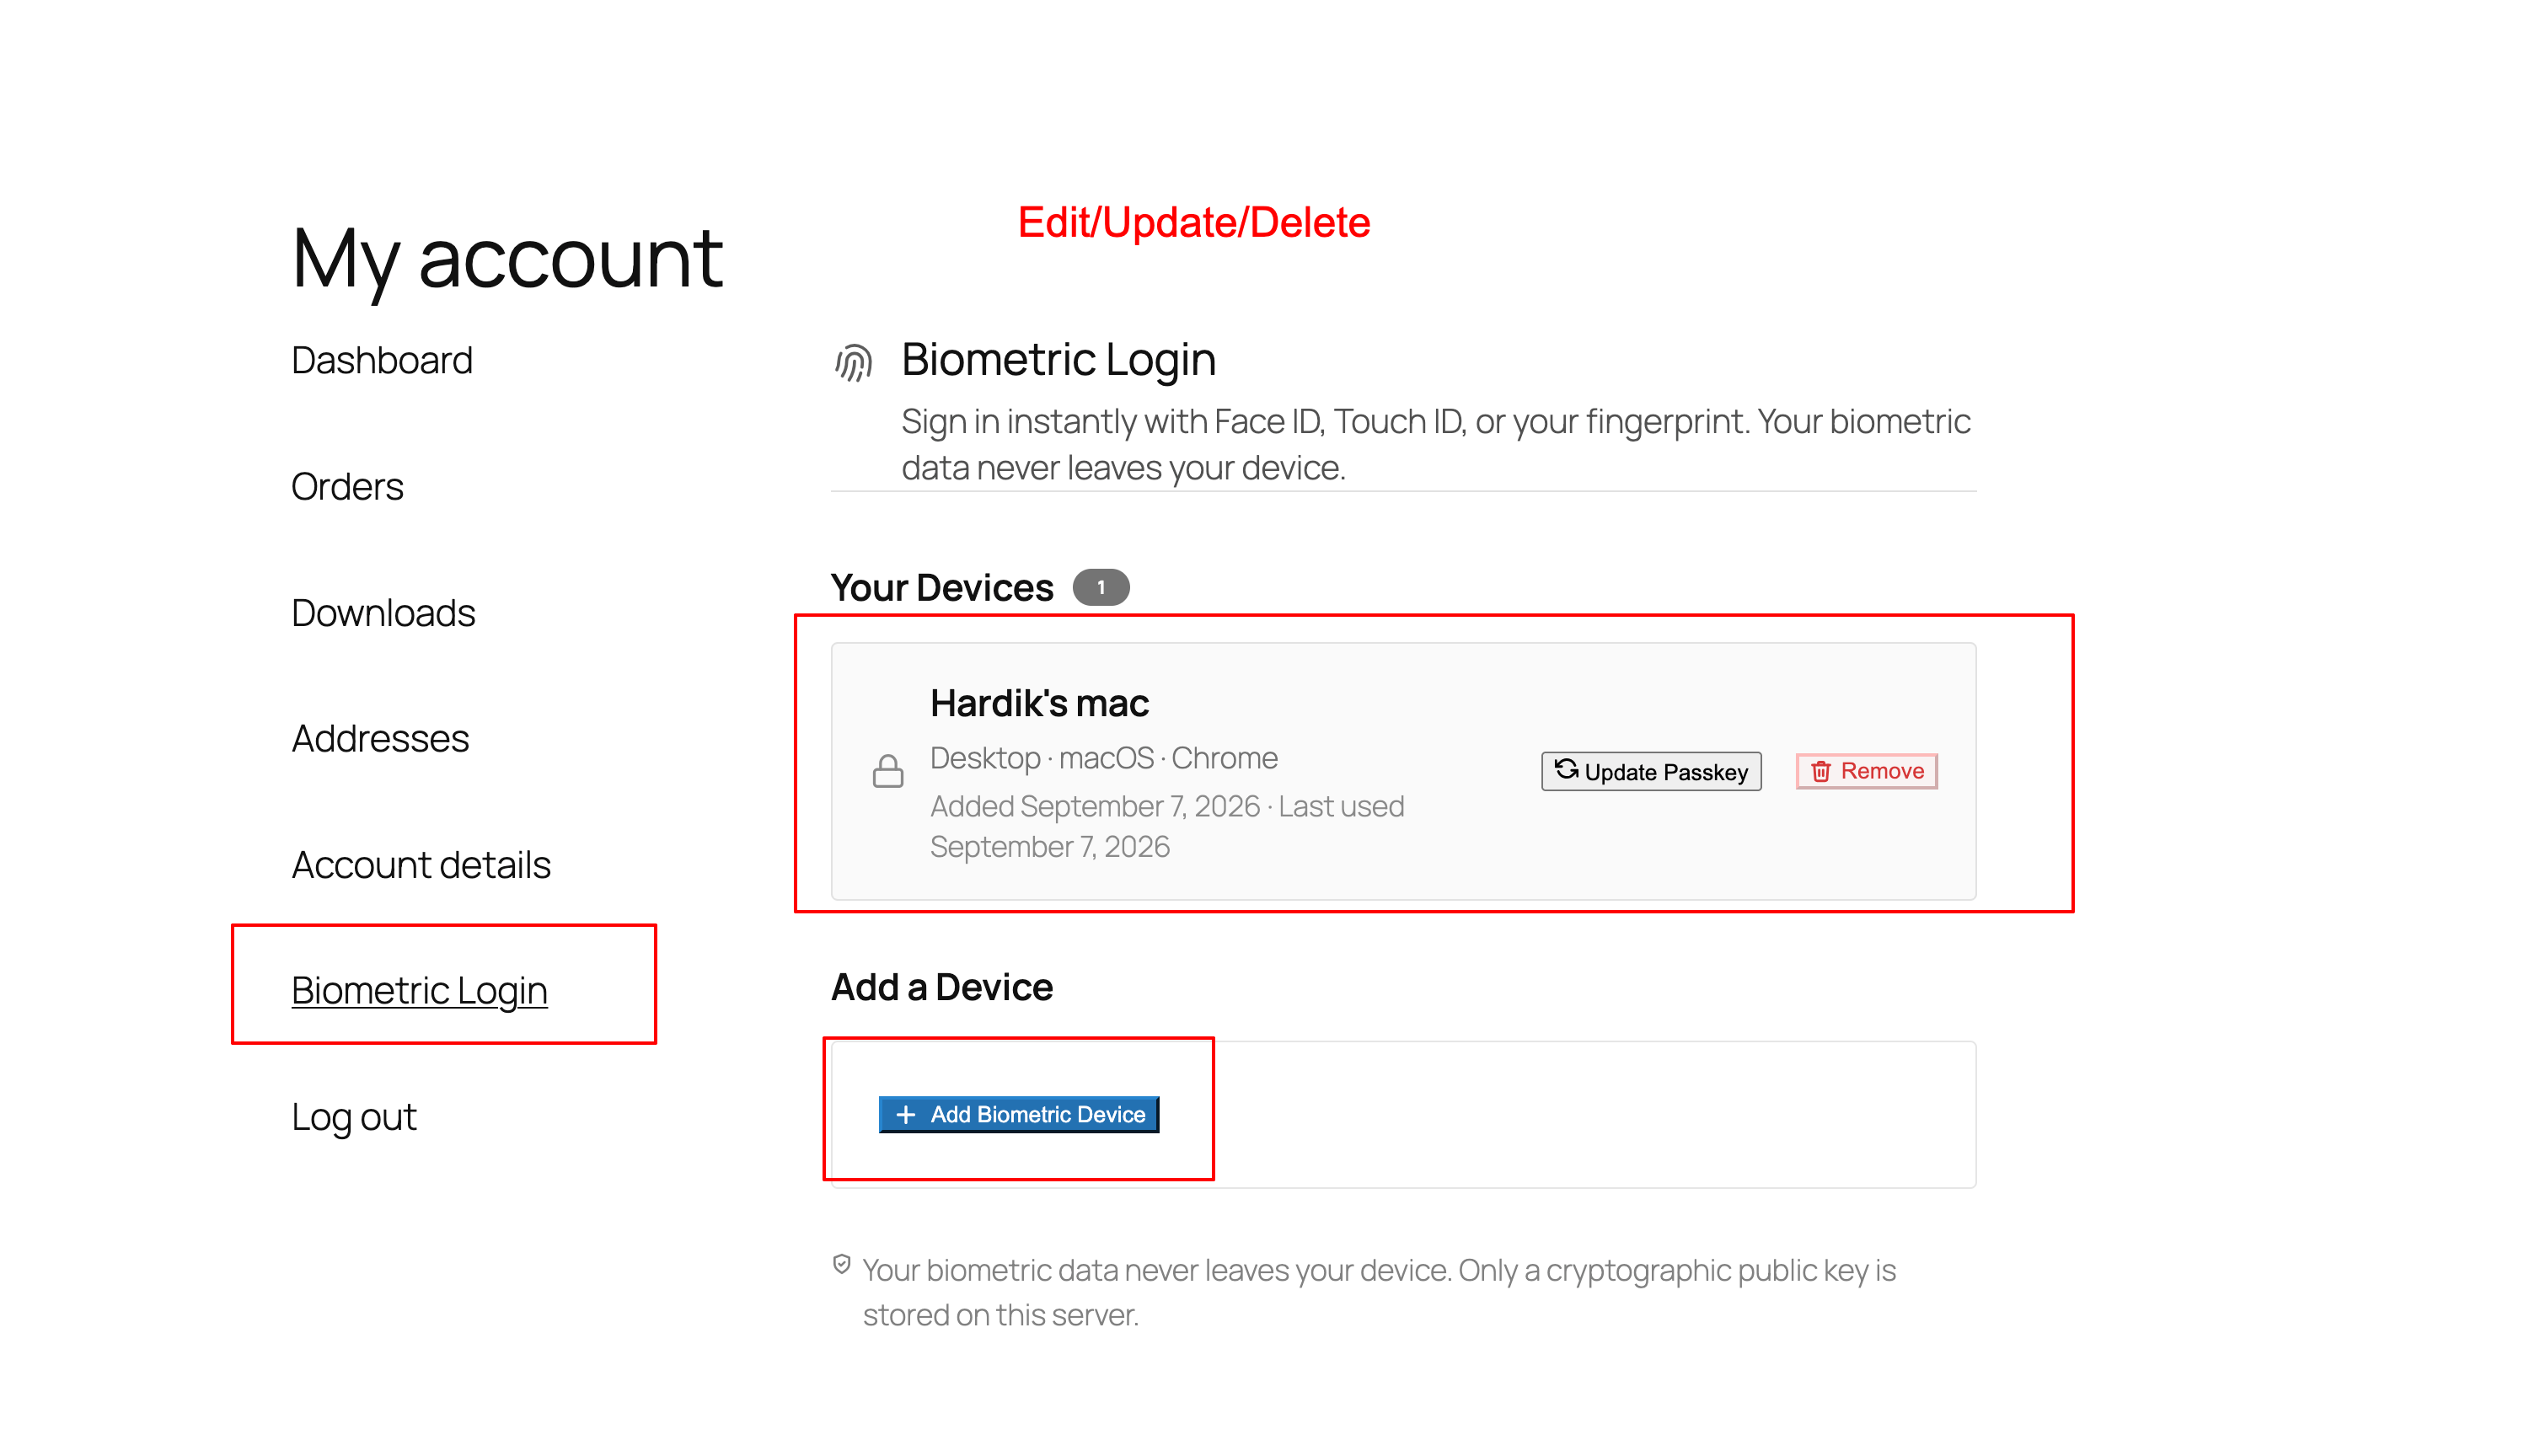
- The WooCommerce My Account area
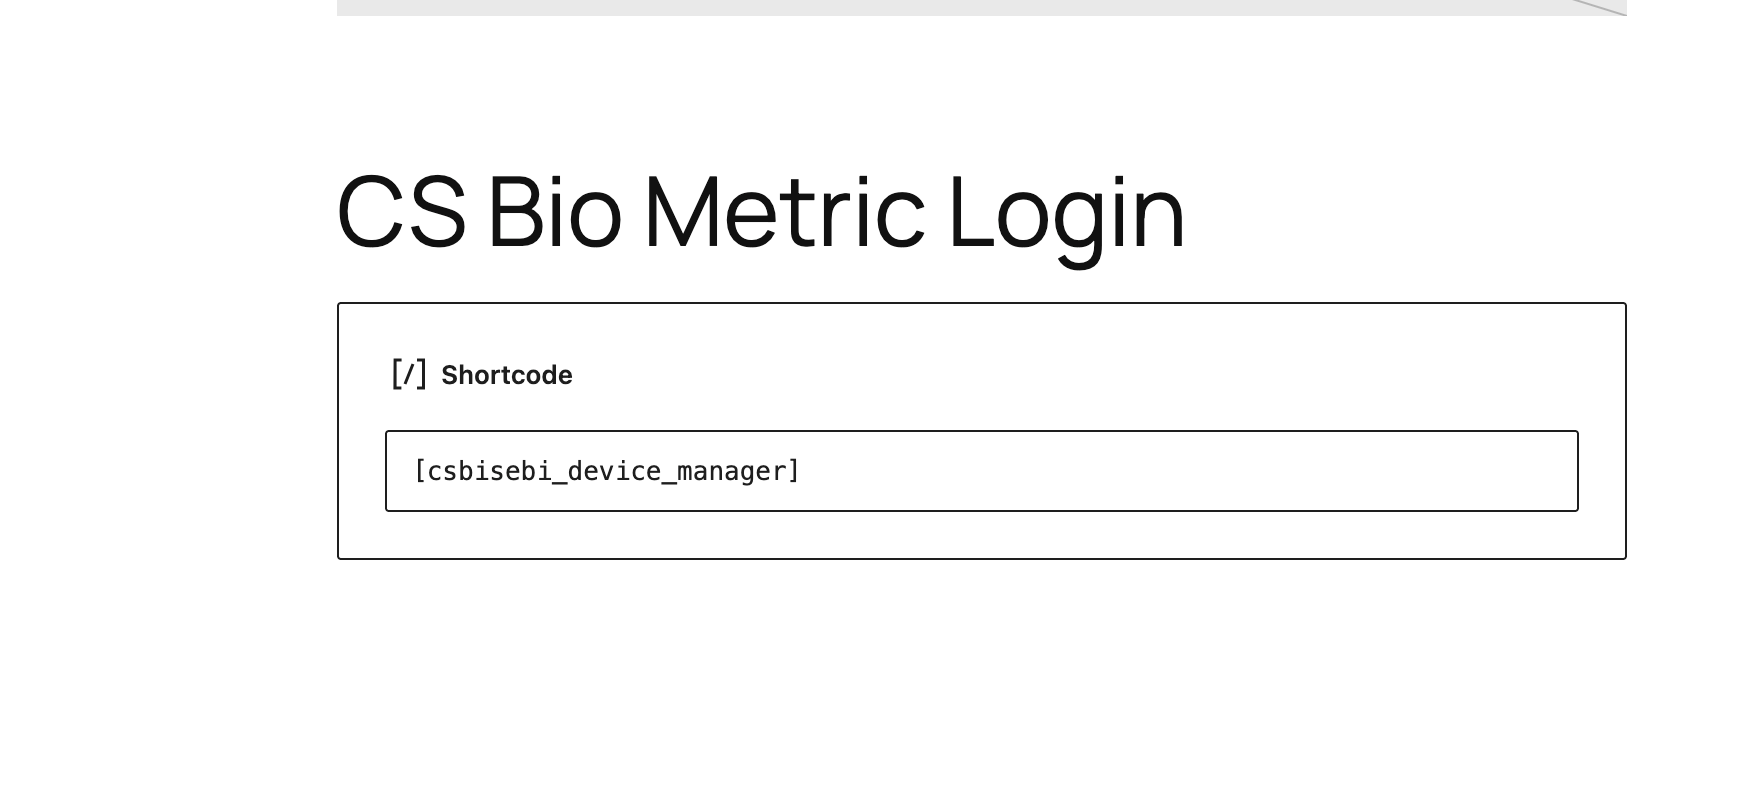
- A page containing the [csbisebi_login_button] shortcode
The browser and operating system are responsible for displaying the biometric and passkey prompts, so the screens may vary slightly depending on the visitor's device and settings.
Important: The website must be served over HTTPS (Including Localhost) for biometric registration to work. For local development, localhost and 127.0.0.1 are also supported. Browsers block biometric registration on standard HTTP connections.
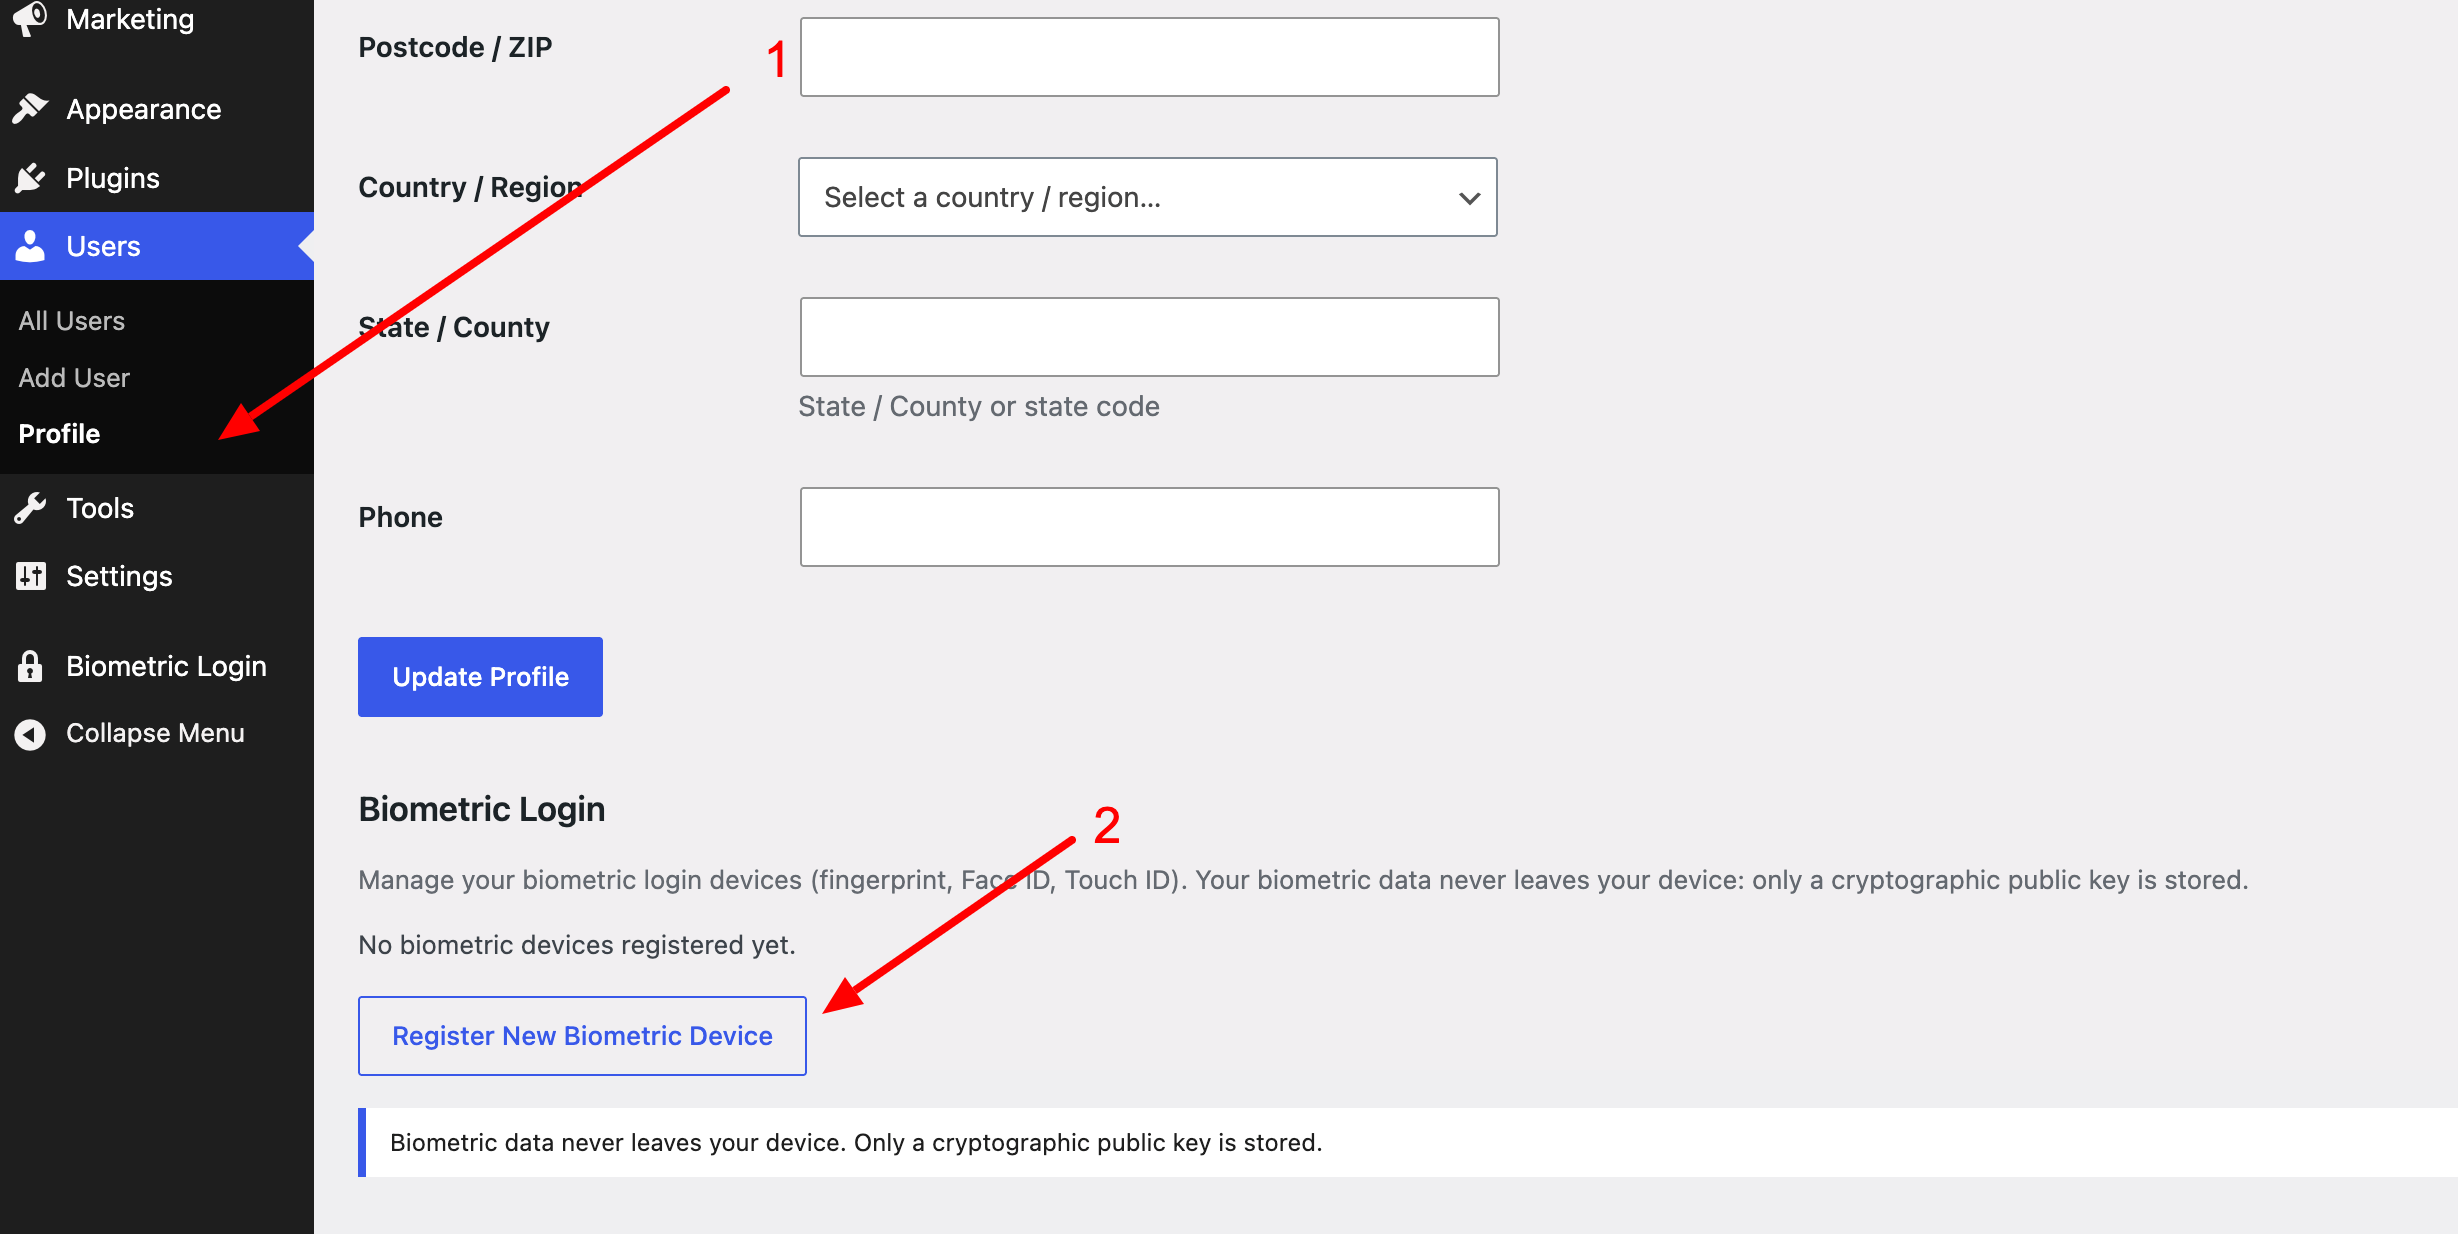
Step 1 - Open the Registration Section
Navigate to the page where biometric devices are managed for your account:
You can also use a page containing the biometric device manager shortcode. [csbisebi_device_manager]
If you are using WooCommerce and allowing for Customers, then please follow the given steps below.
My Account → Biometric Login
Step 2 - Start the Registration Form
Click “Register Biometric Device Now”.
A small registration form will appear with a device name field and a “Start Registration” button.
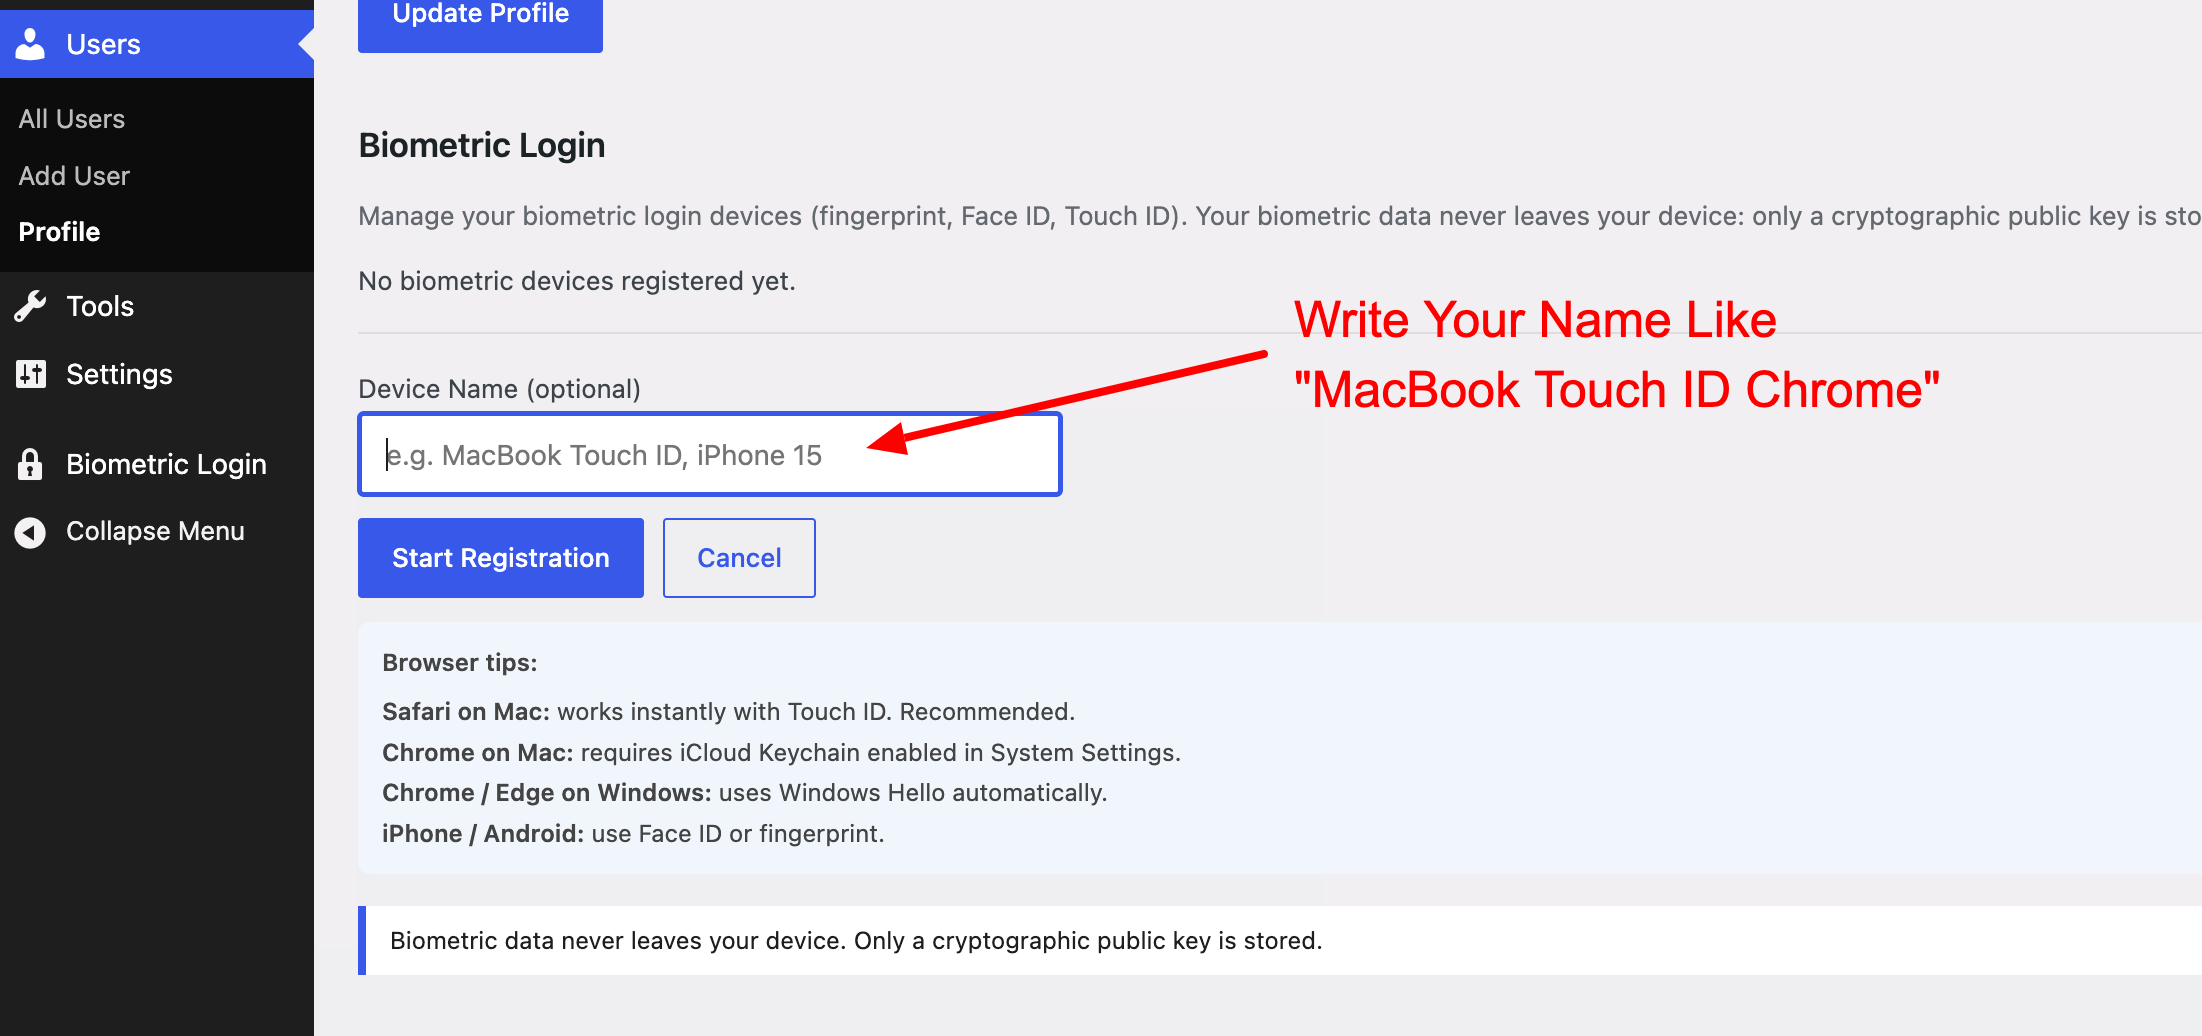
Step 3 - Name the Device (Optional)
You can optionally enter a name for the device, such as:
- MacBook Touch ID
- iPhone 15
- Windows Laptop
The device name is only used to help you identify your registered devices later. It does not affect how the passkey is created or stored.
You can also leave this field blank and use the default device name.
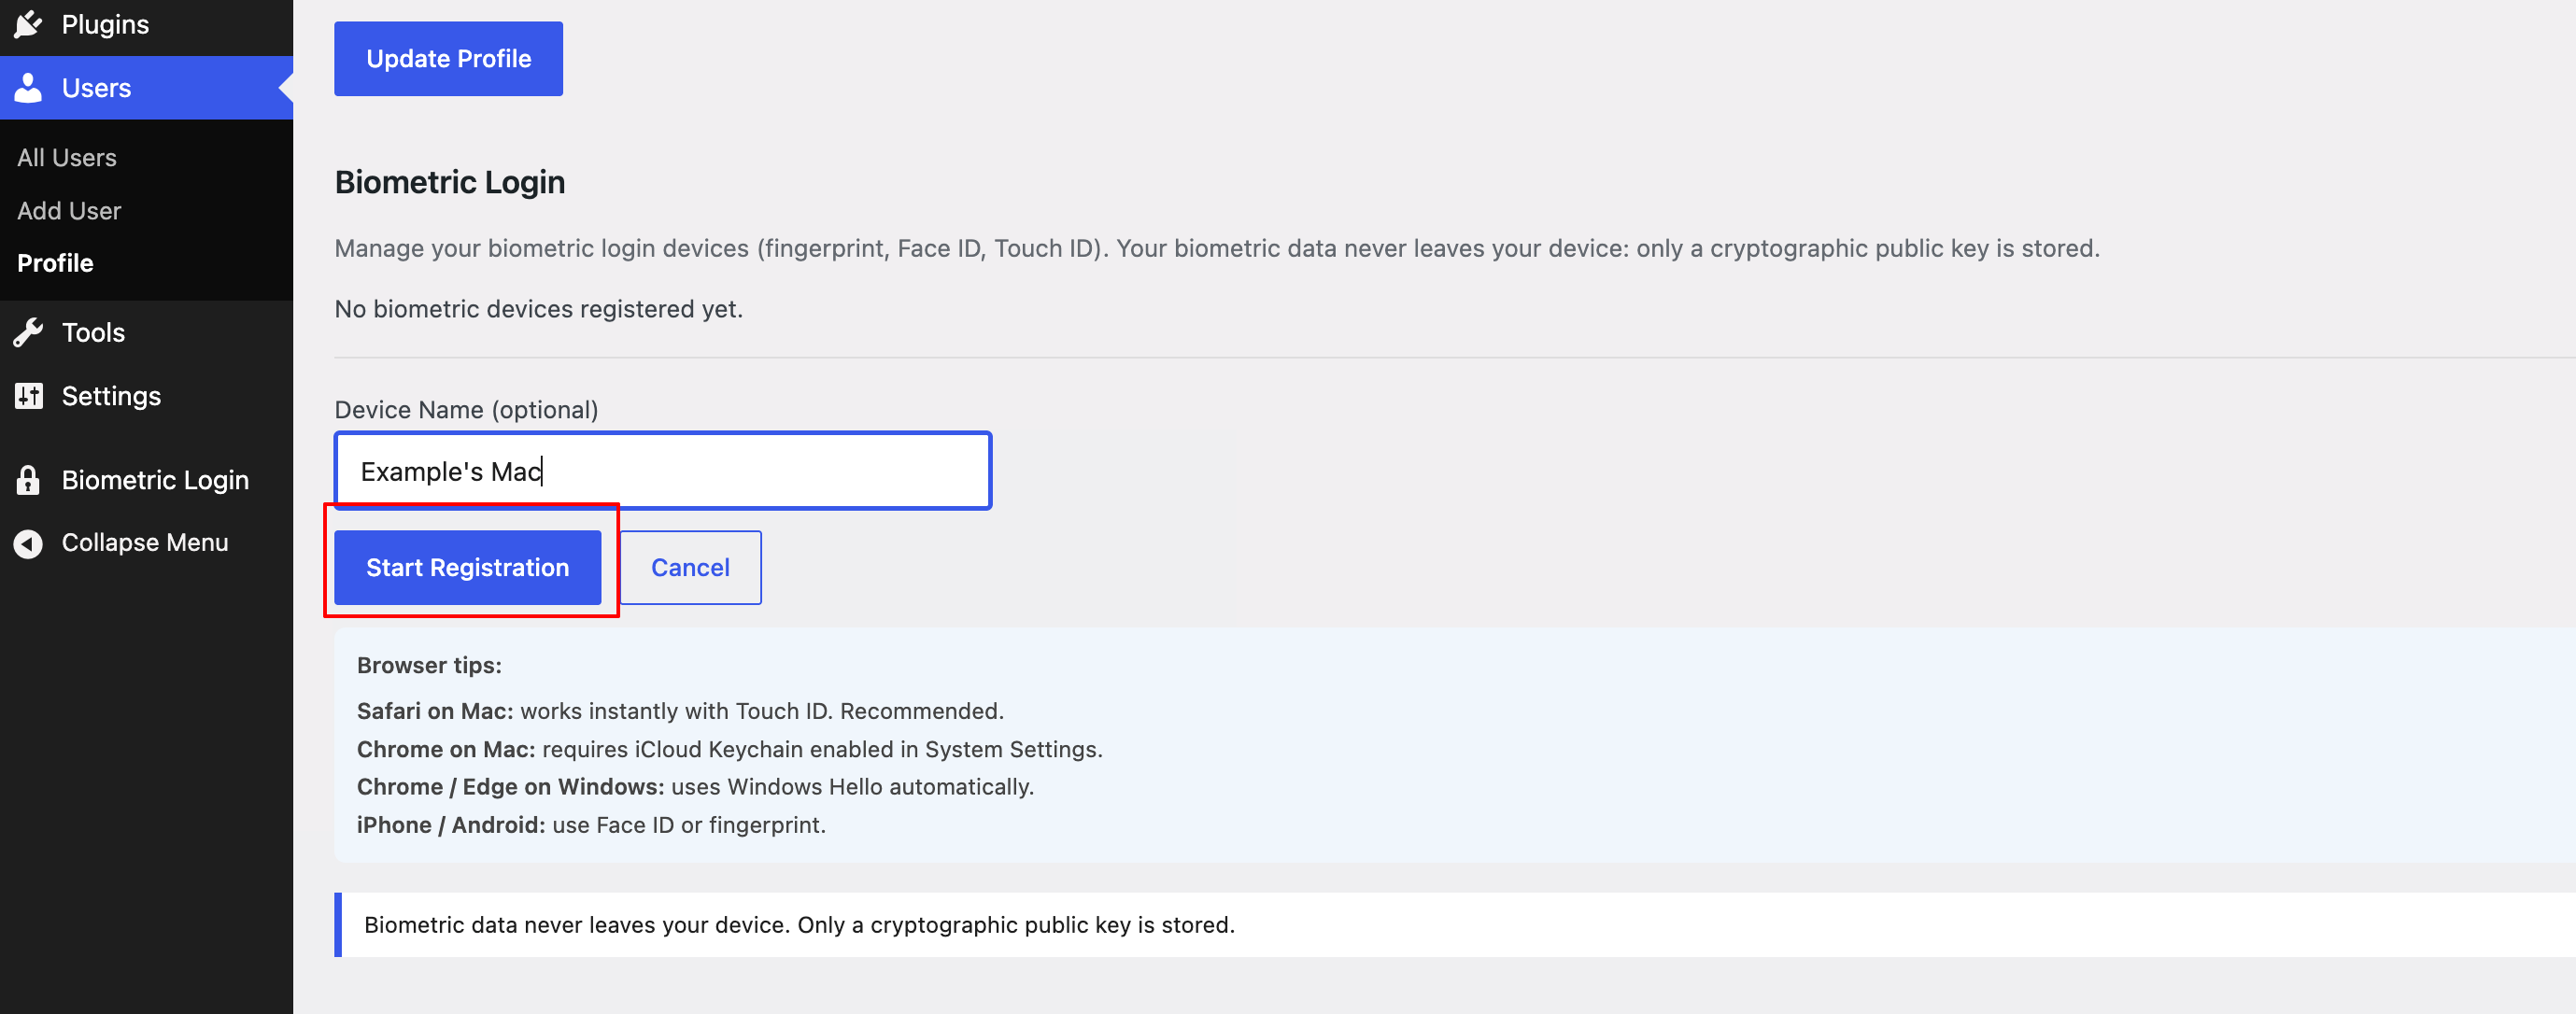
Step 4 - Click “Start Registration”
Click “Start Registration”.
CS BioLogin will request a registration challenge from the server and then hand the process over to your browser's native passkey system.
From this point onward, the prompts are controlled by your browser and operating system, rather than the plugin.
Step 5 - Choose Where to Save the Passkey
The next screen depends on the browser, operating system, and available authentication methods on the device.
Follow the instructions below for the browser you are using.
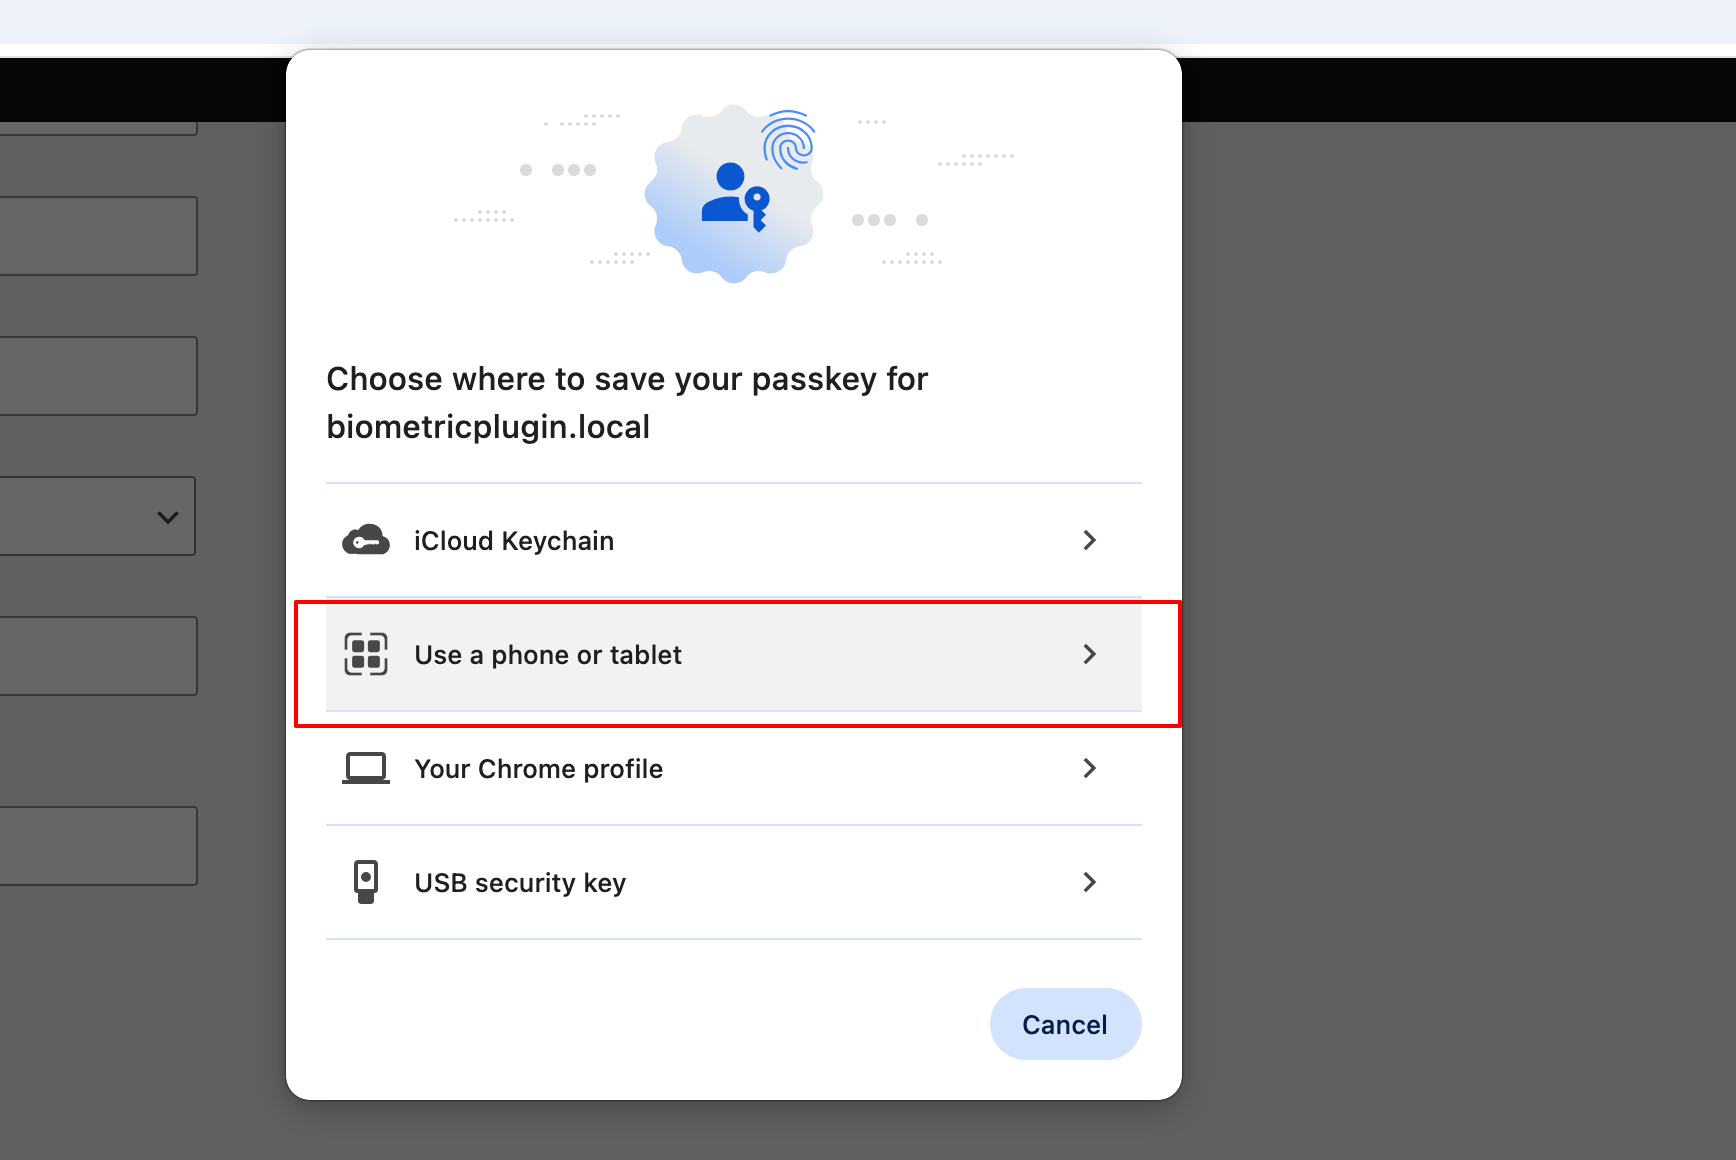
Chrome: Choosing a Passkey Provider
Google Chrome may display a dialog such as:
“Choose where to save your passkey for [site]”
Depending on your device and configuration, you may see several options. Any of these options can ultimately be protected using a fingerprint, Face ID, device PIN, or another supported authentication method.
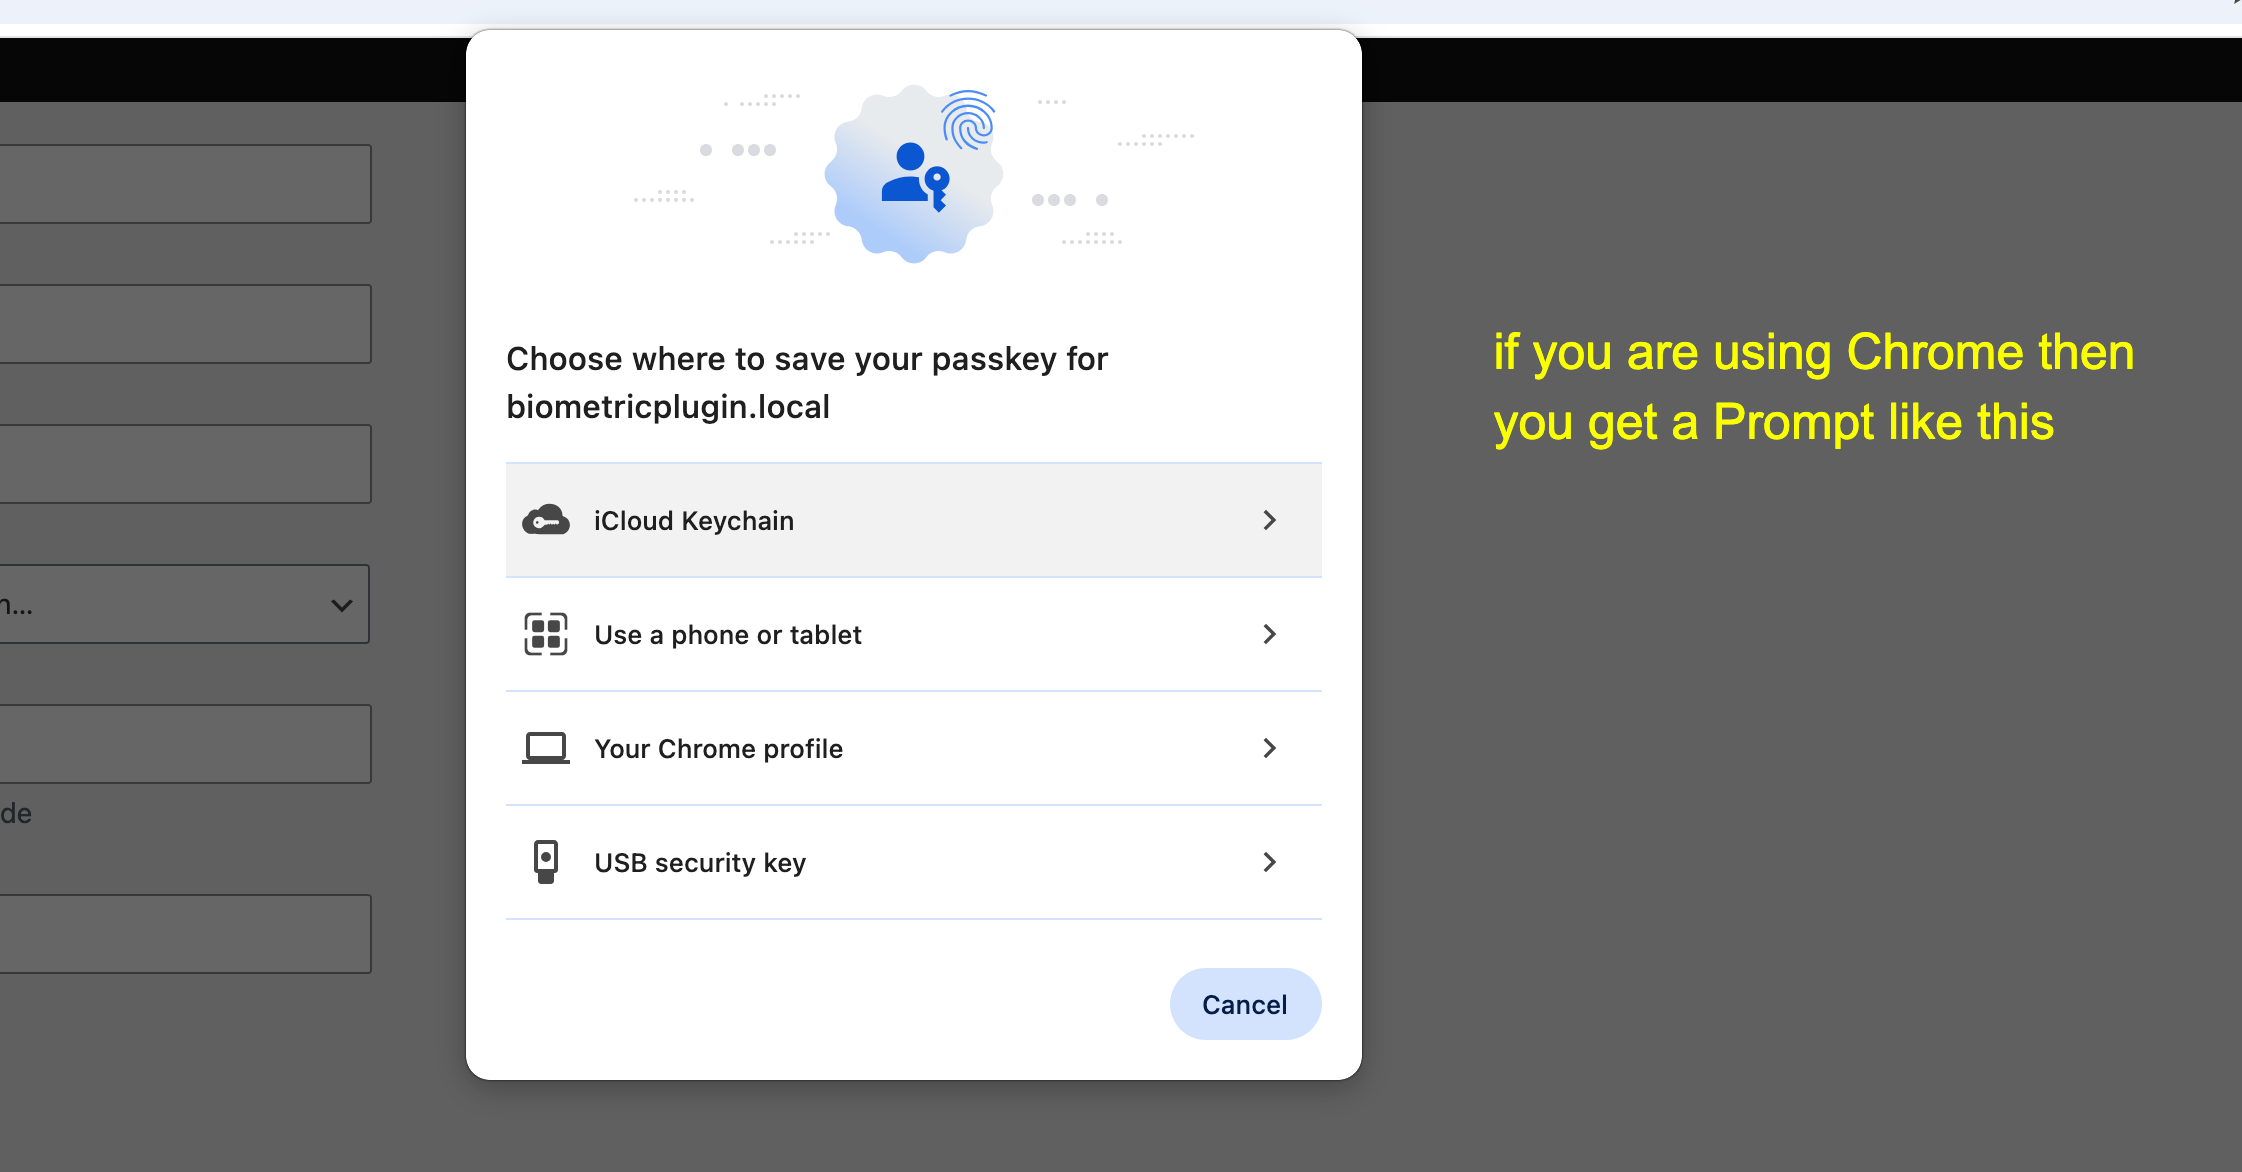
5.1 - iCloud Keychain
This option may be available on a Mac when Chrome is configured to use Apple's password autofill features.
Choosing this option stores the passkey in iCloud Keychain, allowing it to sync across supported Apple devices.
macOS may ask you to confirm the registration using Touch ID or your Mac login password.
When signing in later, the passkey can be unlocked using the same authentication method.

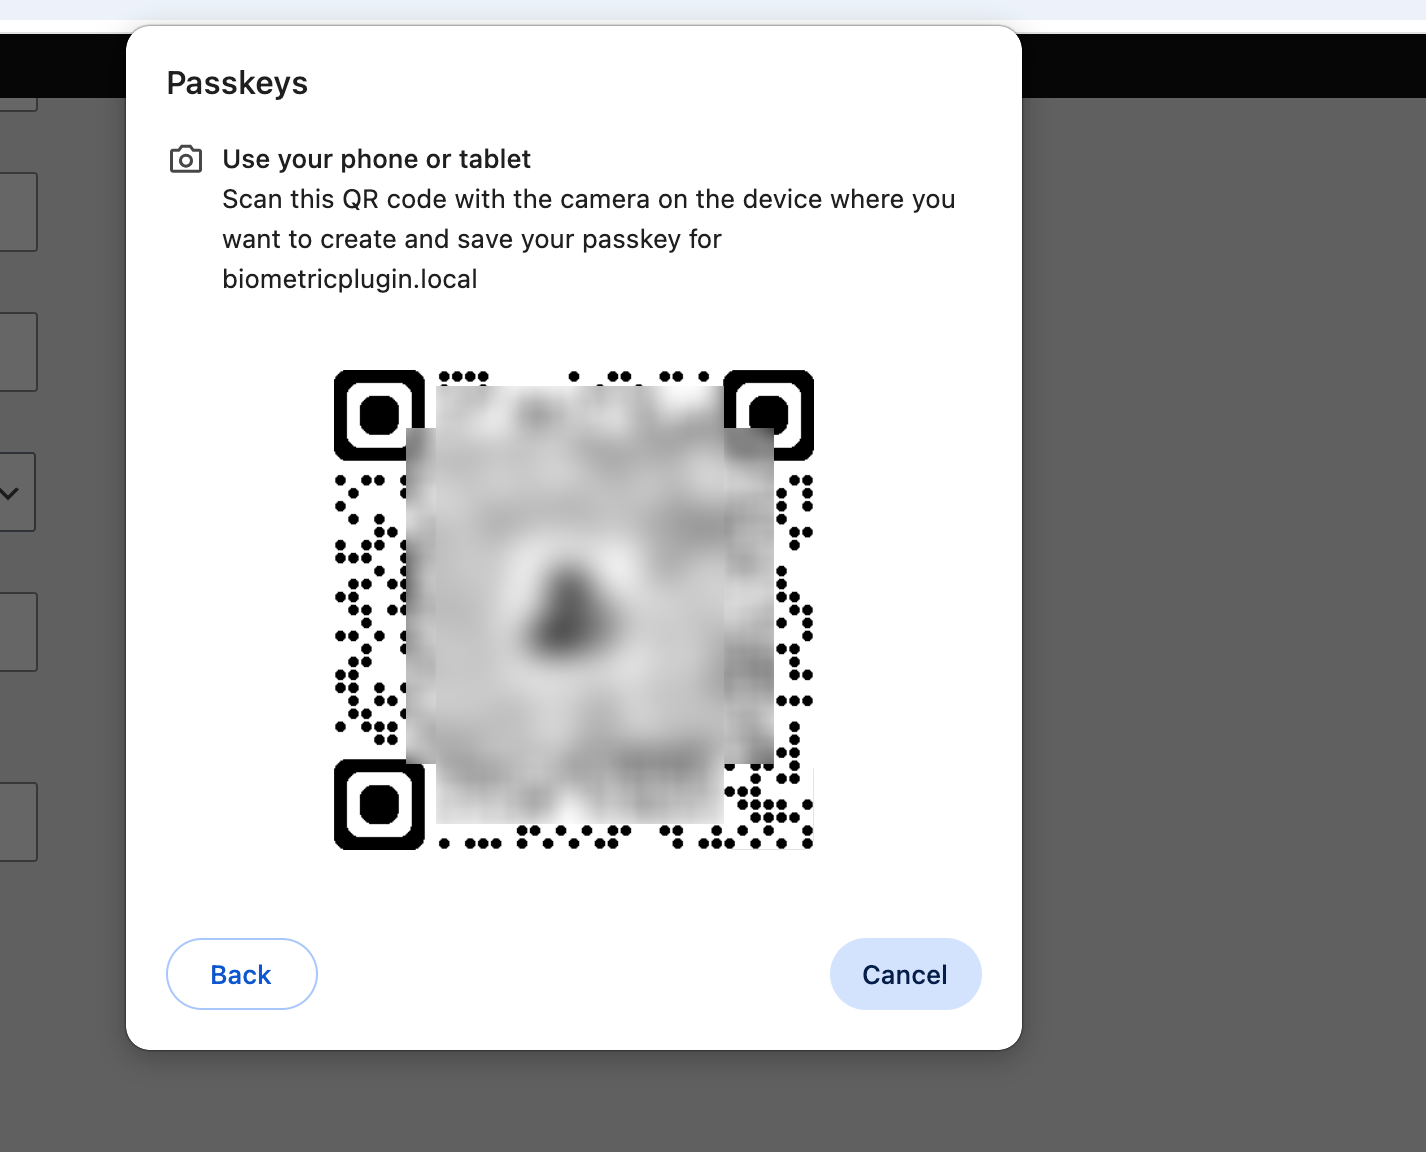
5.2 - Use a Phone or Tablet
Chrome may offer an option to use another device, such as a phone or tablet.
A QR code will be displayed. Scan the QR code using the phone or tablet's camera and follow the prompts.
The two devices may use Bluetooth to establish the connection. You will then authenticate on the phone or tablet using fingerprint, Face ID, or the device PIN.
The passkey is stored on the phone or tablet rather than on the computer.
This is especially useful when the computer does not have a built-in fingerprint reader or other compatible biometric hardware.
5.3 - Your Chrome Profile
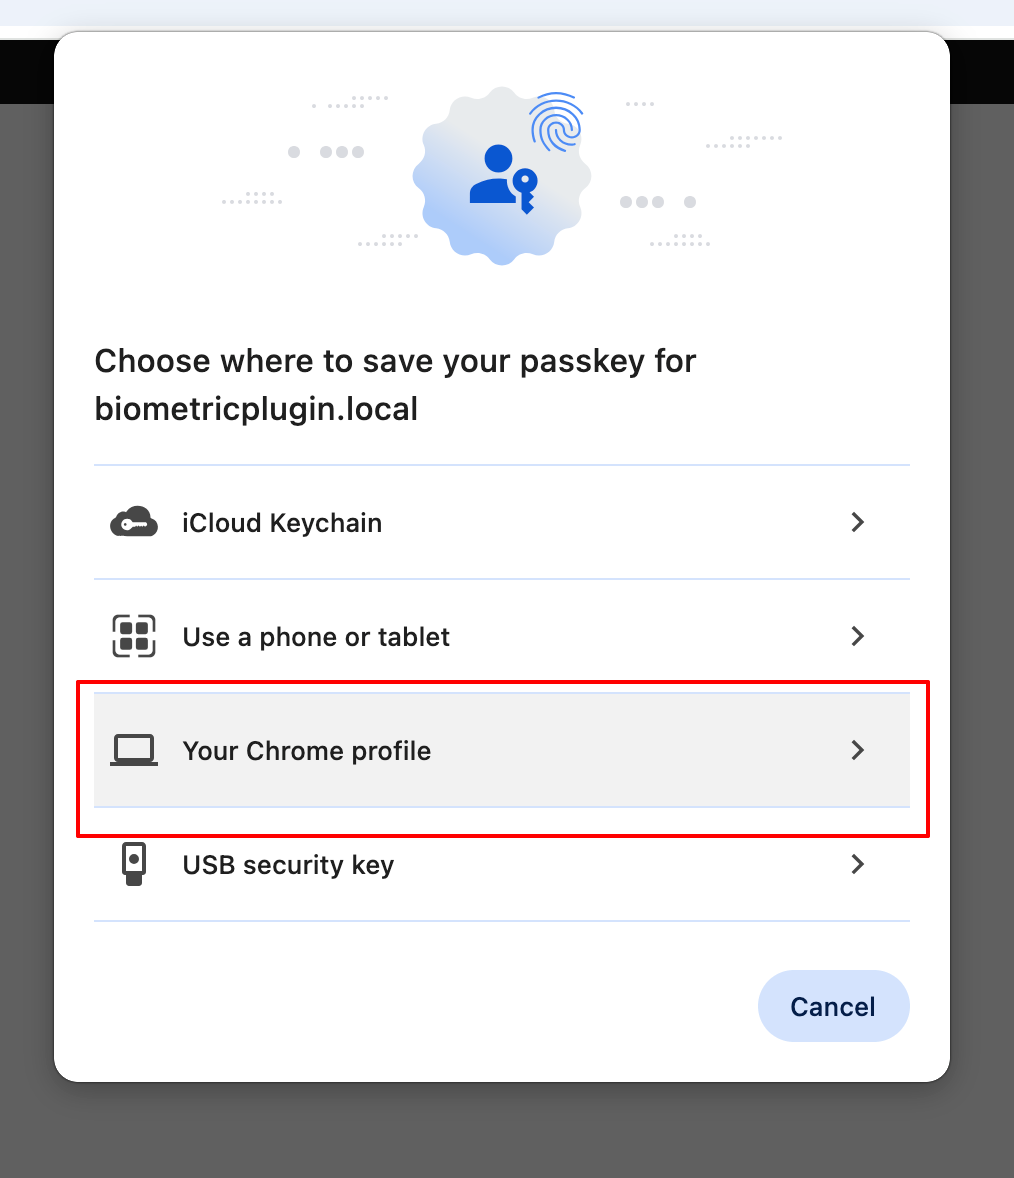
This option saves the passkey using Google Password Manager and associates it with the Google account used by the visitor's Chrome profile.
The passkey can then sync with other supported devices signed in to the same Chrome profile.
Depending on the operating system, Chrome may also require local authentication, such as Windows Hello, Android fingerprint authentication, or another device-level security method.
5.4 - USB Security Key
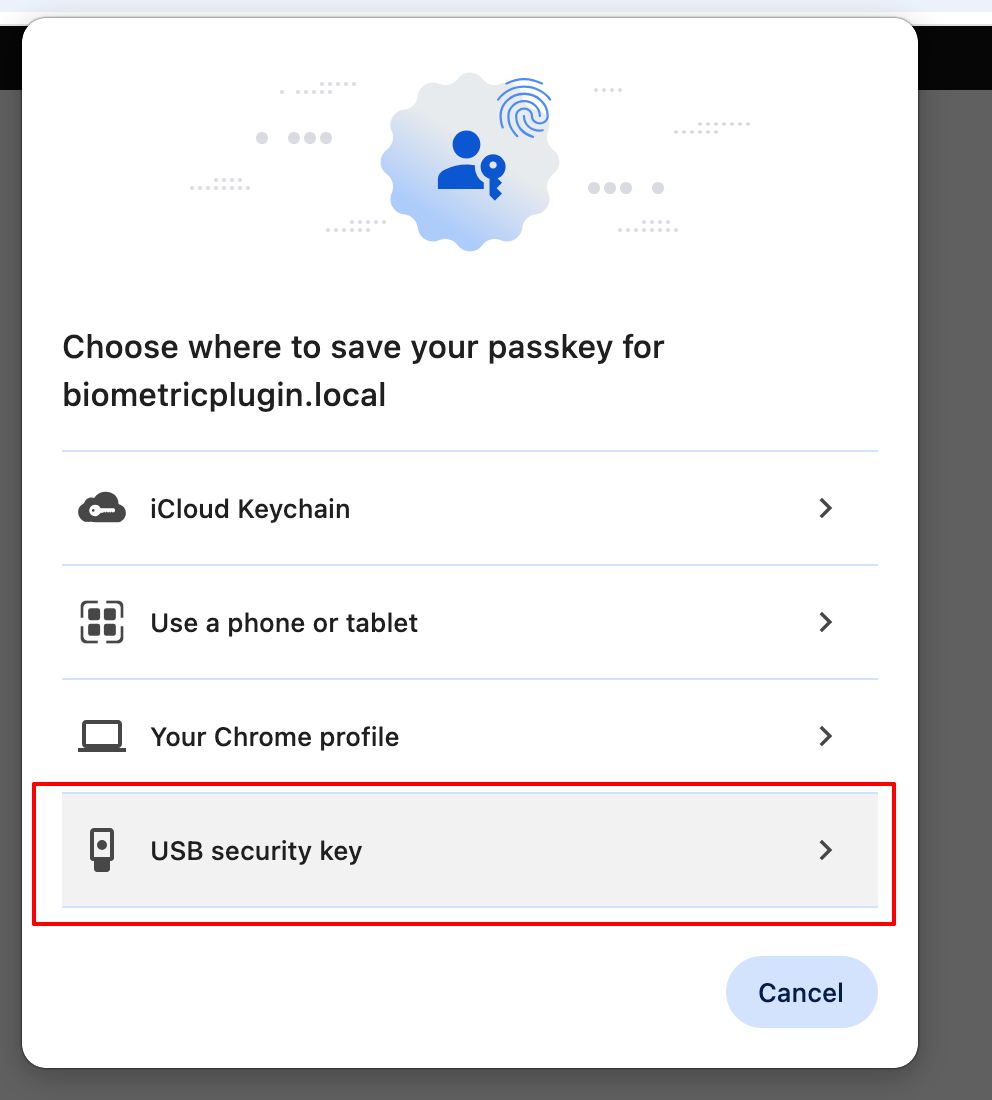
This option is intended for a physical security key, such as a YubiKey or another compatible authenticator.
Insert or connect the security key and follow the browser's instructions. Some security keys require the user to touch the key to confirm the registration.
Certain security keys also include their own fingerprint sensor. In that case, the fingerprint used for authentication belongs to the security key rather than the computer.
Safari: Saving with Touch ID or Face ID
Safari generally provides a simpler passkey experience.
The available options depend on whether the current Mac, iPhone, or iPad has a compatible biometric authentication method.
[Screenshot 6]
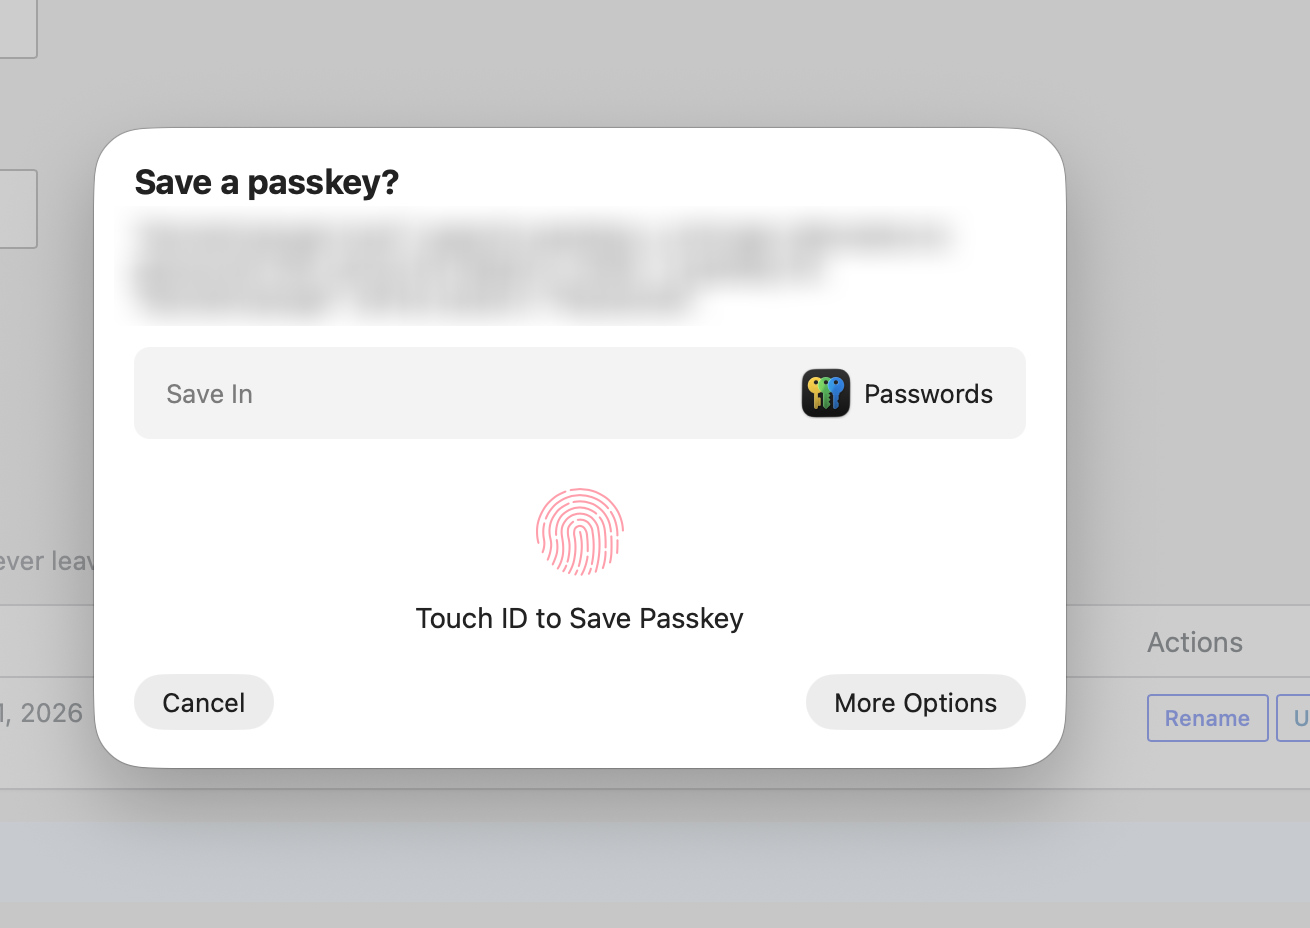
6.1 - Save Directly with Touch ID or Face ID
If the device already has Touch ID or Face ID configured, Safari may allow the passkey to be saved directly on the current device.
Simply follow the on-screen instructions and authenticate using:
- Touch ID on supported Macs
- Face ID on supported iPhones and iPads
No additional device may be required.
6.2 - Use a QR Code on Another Device
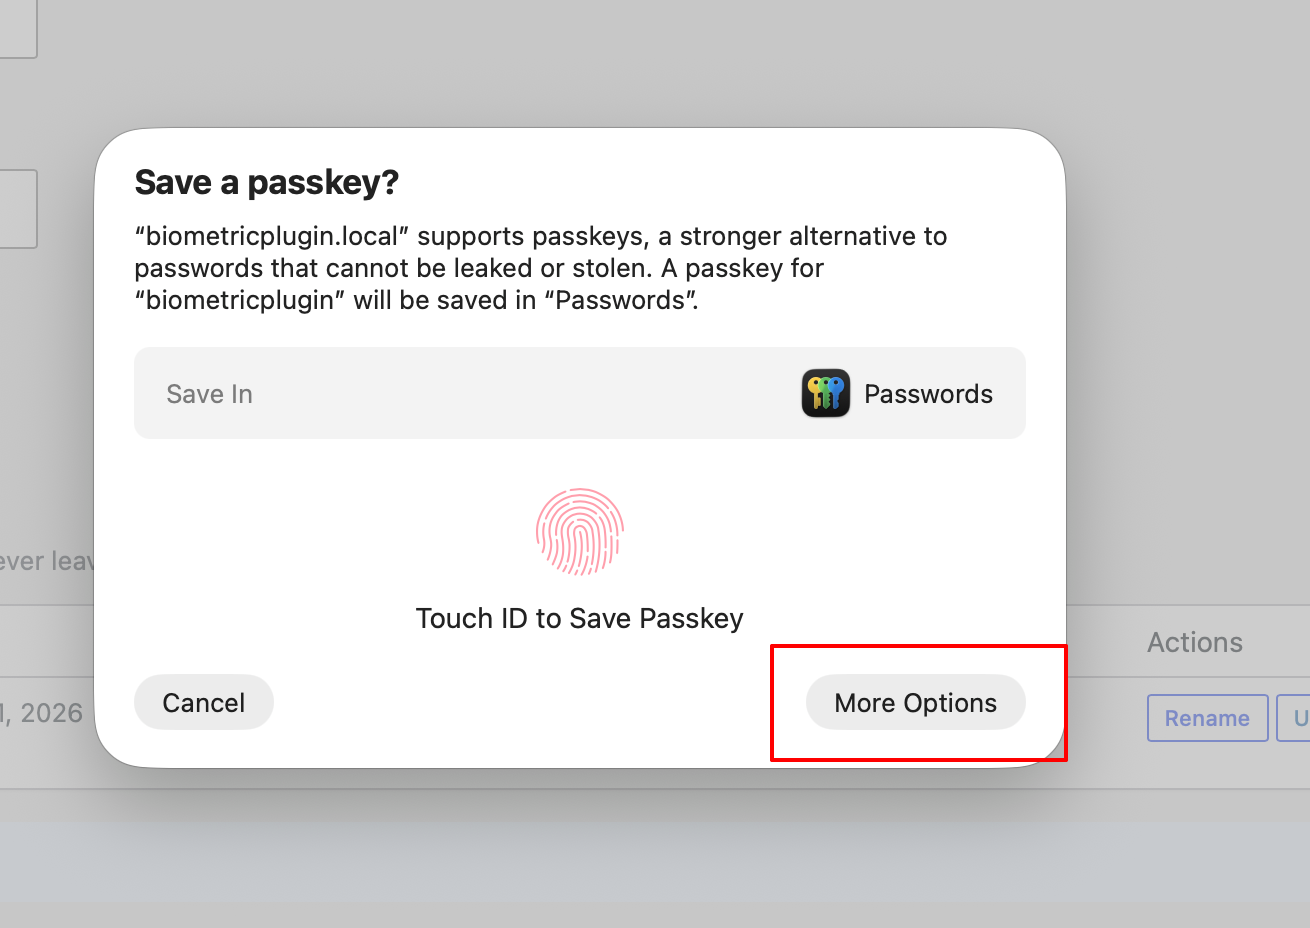
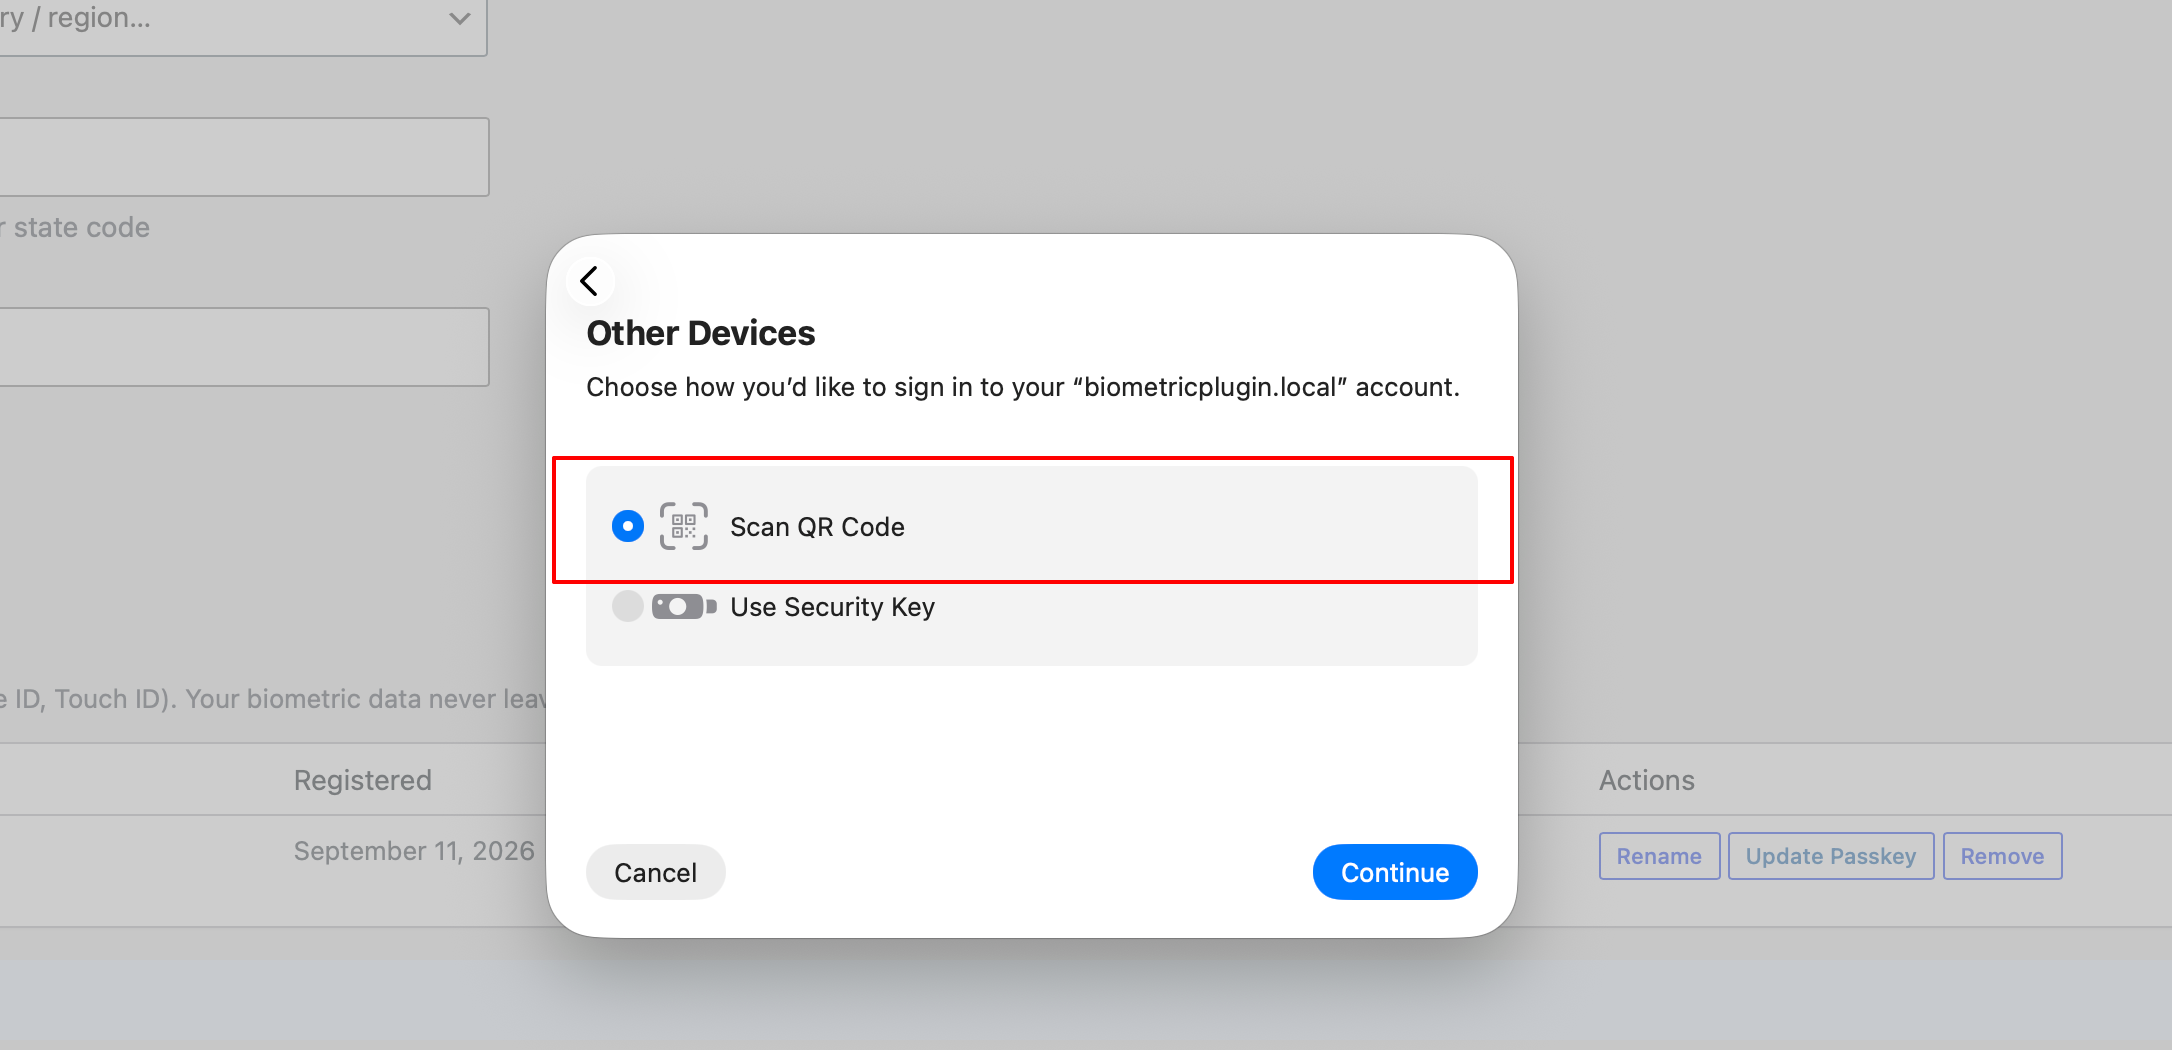
If you want to save the passkey on a different device, such as an iPhone or iPad, Safari may provide an option such as:
More Options → Scan QR Code
Scan the QR code using the other device's camera and complete the authentication using its fingerprint, Face ID, or device PIN.
The passkey will then be stored on that device.
Step 6 - Registration Confirmation
After the browser completes the registration successfully, CS BioLogin will display a confirmation message:
“Device registered successfully!”
The newly registered device will also appear in the account's biometric device list.
[Screenshot 7]
Signing In with a Passkey
Once a passkey has been registered, you can use biometric sign-in without entering your password.
On the login screen, select the biometric/passkey sign-in option.
Your browser will display the appropriate authentication method based on where the passkey was saved. This may include:
- Touch ID
- Face ID
- Windows Hello
- Fingerprint authentication
- A QR code or phone-based authentication
- A physical security key
Simply complete the authentication prompt to sign in.
No password is required when the passkey is successfully used.

.png)
.png)
.jpg)